Welcome to the new Unicron.com Alterations Blog! Although some people call them "kitbashes" or "customs,” we prefer “Alterations” because it takes more than just paint or a model kit to produce these works of art! With all the functionality that Blogger has to offer, we now provide a totally interactive database where posts can be viewed, commented upon and organized based on series, artist, character, or your own unique search criteria! (Check out the nav bar for suggestions.) To post comments, sign in with your valid ID from Google, Blogger, AIM, LiveJournal, WordPress, or TypePad.
For you artists out there, showing off your work is now easier than ever. Simply e-mail digital photos to: obsidian@unicron.com. We'll get them uploaded and linked as promptly as we can. Thanks for visiting and for all your contributions!
 After picking up the Leader Class Jetfire figure from a local Walmart, I couldn't help but notice that the figure was greatly lacking in his combined mode. I mean, the legs were immovable and there was lots of unnecessary kibble hanging about, clogging up the articulation that I knew the figure to have. So what did I do about this you ask? Why, I did what allTransformers customizationists do; CUSTOMIZE! After picking up the Leader Class Jetfire figure from a local Walmart, I couldn't help but notice that the figure was greatly lacking in his combined mode. I mean, the legs were immovable and there was lots of unnecessary kibble hanging about, clogging up the articulation that I knew the figure to have. So what did I do about this you ask? Why, I did what allTransformers customizationists do; CUSTOMIZE!
I started out having to remove the back bit  of Jetfire's torso and chest area so that I could make room for more movement, which in its own fault, caused me to remove the electronics from Jetfire(no problem, Jetfire wasn't a Scotsman in the movie anyways) After doing this, I promptly proceeded to remove both hands as they were no longer necessary due to me having removed his robot mode.Also, I took the liberty of carving out two slots within Prime's abdominal region, you know, where the two red bits off of his chest plug in? Alright, just checkin' if you're following me! They now slide in easy as pie now that I've made my marks. I also took the liberty of swapping out the hands with much more articulate ones from the Movie '07 Prime figure. They can now swivel and point accordingly! of Jetfire's torso and chest area so that I could make room for more movement, which in its own fault, caused me to remove the electronics from Jetfire(no problem, Jetfire wasn't a Scotsman in the movie anyways) After doing this, I promptly proceeded to remove both hands as they were no longer necessary due to me having removed his robot mode.Also, I took the liberty of carving out two slots within Prime's abdominal region, you know, where the two red bits off of his chest plug in? Alright, just checkin' if you're following me! They now slide in easy as pie now that I've made my marks. I also took the liberty of swapping out the hands with much more articulate ones from the Movie '07 Prime figure. They can now swivel and point accordingly!
Finally he was ready! The only thing left to do now was to actually combine them to see how the pieces fit together once my modification had been completed.The results are absolutely fantastic! No longer will JetPrime be subjected to poor leg articulation, since his upgrade, he's undergone some extensive retooling...  I have to say that even though this project was a success, there are a few minor gripes that I'd like to point out. For one, he can no longer hold his gun quite as tightly as the original hands could. This isn't a huge complaint but I feel that I could have done better. With that said, I'd recommend this mod to pretty much anyone who'd like a good JetPrime figure. The mod is quick, simple and all in all, a more enjoyable figure than it's previous state. -LM
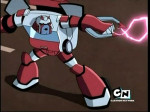 Prototype Ratchet Magnets: Prototype Ratchet Magnets:
The items show in this album are a second round prototype for the magnets in our upcoming accessory pack #6! The final version will differ in a number of ways (for the better), but here's a close up look at an earlier stage of what is soon to come.
It's been a long time since we've shown off any our own alterations handywork. TFA Ratchet, along with pretty much every other TFA toy has an amazingly show accurate head sculpt, only it seems to lack the proper paint to back it up. I've repainted the head of this toy, sanded down the post on his forearm so his EMP generator will stay attached, and (last but not least) added show accurate magnets. I hope you like.

There is an ebay auction up featuring Thyvipera's own custom Omega Supreme. This figure is modeled off of the Energon Omega Supreme figure cusing the original G1 colorscheme. You can view this auction here.

Here at Unicron.com we would like to celebrate the work of TFMaster (and the purchase of our new scanner) with some never before seen photos of his early work. Back in the day, TFMaster would send us 35mm photos to put in our Alterations section because he didn't have a digital camera or scanner. The times sure have changed. Now after replacing our long since broken scanner, we can debue a few more yet unseen photos of TFMaster's amazing early work.
Bill Koshorek (aka TFmaster) saddly, passed away on March 11th 2007 at age 31, but has left all of us TF-fans with a legacy of amazing work. May Bill rest in Peace. He will not be forgotten.
Thanks again to Shinobitron for another great chapter in our exclusive Alterations how-to Article series.
Step 1
As always you have to know what materials your gonna need for a project. This piece is fairly minor and is mostly a repaint with some sculpting. Tools needed: Sculpt, Screwdriver, Dremel, paints (and brushes), X-acto knife. First thing first is to wash your figure with dish soap and water. This will remove the mold release and make paint stick much better. I always like to start with the head (but of course area of starting is up to you). I like to disassemble so my piece is easier to work with, but again this is your choice.
Step 2The best thing to do is get some reference pics to work with ( like here on Unicron.com) so you know what you're shooting for. After looking at some Swindle pics I changed the Strongarm head into the one in pic 2 using Apoxy Sculpt. If it doesn't come out right or the areas are to high don't worry we'll take care of that later.   Step 3 Okay so now you have the main sculpt done, but he still has Strongarm's body. You have 2 choices now 1) Paint the entire body black then paint over the black with the appropriate color or 2) Paint the body white then use clear yellow to make him his right colors and fill with black later.I based the entire body black and will now start matching to Swindles G1 scheme. Step 4 I took him apart to avoid getting paint spatter on different colored areas. You want to use multiple light coats. This will avoid paint stroking and give you a nice solid color. This is especially important when doing light colors over black. You want to avoid heavy coating also due to the fact you might end up filling areas that you wanted black lining to show.  Step 5
Allrighty almost done! If you didn't tear him apart you all set but if you did its time to put him back together and make sure your happy with his color scheme. Step 6 Now that your happy with his main colors it's time to add the little details. These are all optional and depend on how much depth you want to add to your figure. You can paint different color lights (head and rear) the seats, fuel tanks, etc. In this step you can also do a little more detail work trimming the head detailing and creating sharp paint lines for face/eyes. Step 7 OK time for some weaponry! Just because you are making a Transformers doesn't me you have to use 100% Transformer products for your figures. I use such items as GI Joe, Power Rangers, Gundam, and even KO pieces and Dollar Store figures. Swindles gun is made from a GI Joe missle and Gundam model part frame. The big gun is made from a Gi joe Gun and a Marvel Legends Showdown missle tip with a Gundam frame as the handle. I had to fill the center of Swindles chest with sculpt then drill a hole that would fit the handle. I also drilled a hole in the large gun to fit the small gun so it would combine like the original. A hole will need to be drilled in Swindles arm to fit the large gun in bot mode. Step 8 last but not least is application of the faction logo. I get all mine from Reprolables.com.
This is the first Chapter of an exclusive series of Alterations How To Articles. Thanks to alterations master Shinobitron for his dedication and time in putting this together for us all.
Chapter 1: How To Set up - Getting Into gear
Before you can start any alteration you need to have the right gear. Doing anything less would be like jumping into a Decepticon nest on one quart of energon and a single bullet (OK that might work if you're Grimlock, but I wouldn't take my chances).
Tools:
Be sure that you have the tools necessary for the job before beginning. For the most part you are going to need the following items Hobby (Exacto) Knife, Screwdrivers, Wire cutters, pliers, and a Dremel tool (small hobby drill as pictured). Not all projects are going to require all of these items but they all are very valuable to have around. Be sure to have a variety of Screwdriver sizes available as most TFs have various screw sizes.

Sculpt:
Sometimes the right piece is not available and you have to do it yourself. Many of my projects have resculpted heads to make them look more like their G1 counterparts. Their are many types of sculpt to choose from but for TFs with moving parts you need something that is going to last.
Aves apoxy sculpt and propoxy/ hercules sculpt is the best to use for ultra durability. Aves turns rock hard when fully cured and is very difficult to chip but takes a long time to cure. It can be purchased from aves website. The other is the Hercules / propoxy. This can be bought at local hardware stores and places like Home Depot and Lowes in the plumbing section. The main use for this is to fix leaks in pipes but has equally useful toy applications. The plus and minus with it is that it takes 5 minutes to cure steel hard.
 Paints: Paints:
Finally comes paint. I use a wide variety of brands of paint in all my pieces. When choosing a paint however do not use the $.97 stuff from Walmart as this is more for Canvas painting and wood and tends to chip very easily. Their is an exception to the Wal Mart paint rule however and that the metallics. These are just as good as the expensive metallic paints. The best paint to use in my opinion are Citadel, Vallejo transparent, Reaper Master Series and Krylons. Krylons of course are a spray paint but make for a very effective base coat. Try to stay away from the Krylon gloss and use either the flat or Ultra flats as these make painting over top much smoother. The other paints, along with Tamiya can be ordered thru hobby/ comic shops and run about $3.00 a pot.

Now that you know what gear to get and you're all set up, our next lesson will be making an Energon Strongarm into everybodies favorite arms dealer Swindle!
Keep an eye our for our Alterations How To articles - Chapter Two.
 Check out these new alterations by our friend Shinobitron! Check out these new alterations by our friend Shinobitron!
He has taken TFA Lockdown and turned him into a sweet transforming robot batmobile.
Hotrod as a classic muscle car, G1 Deluxe Insecticon Chop Shop, Energon style autobot tape Steeljaw, and Deception Swindle made from Energon Longarm. (Keep your eyes out for a simple Swindle alteration tutorial coming soon!)
As a follow-up to Sabrblade's post asking about fan's experience with new Transformers: Animated figures, we thought we'd point out an excellent thread on Allspark.com where toy alterations guru Jin Saotome outlines a few very simple ways to correct issues people have mentioned. As he eloquently puts it, "...I agree that toys should come without problems right out of the box, but sometimes there are things that need to be worked out with a new series..." He also give instructions on contacting Hasbro and doing our part to let them know, when appropriate.
 TheTransTorture has re-decoded Transformers Animated Optimus Prime and Bulkhead even before they've hit the shelves! Check out his awesome battle damage Animated Optimus Prime and Bulkhead alterations. He's given these two very animated style toys a very realistic battle damage treatment and the outcome is surprisingly cool. TheTransTorture has re-decoded Transformers Animated Optimus Prime and Bulkhead even before they've hit the shelves! Check out his awesome battle damage Animated Optimus Prime and Bulkhead alterations. He's given these two very animated style toys a very realistic battle damage treatment and the outcome is surprisingly cool.
 update: Bill Koshorek (aka TFmaster) saddly, passed away on March 11th 2007 at age 31, but has left all of us TF-fans a legacy of amazing work. Thank you. We pray that Bill is at Peace. update: Bill Koshorek (aka TFmaster) saddly, passed away on March 11th 2007 at age 31, but has left all of us TF-fans a legacy of amazing work. Thank you. We pray that Bill is at Peace.
TFMaster's own Alts Page at Transtopia. W/ much of his very nice work. Check it out here along w/ these links to his other stuff
Here are some links to his custom work: G1 Devastator1 pic2, pic3 , RID gestault Pic1, Pic2
G1 alterations: Galvatron, Megatron, Ratchet, Rodimus Prime, Sharkticon & Starscream BMach alts: Jetstorm, McDonalds toy recolors, Megatron, Mirage, Nightscream, Obsidian, Optimus Primal, super beast mode Primal, Silverbolt, Thrust His own original creations: BW Bombshell, Bonecrusher, Centorr, Grimlock, Grimlock pic 2, Ratbat (CD!), Slag, BW Starscream\
Joseph Barajas sent us a cool pic of a Botanica figure he made.
Peter van Beek sent us a nice pic of the 1st BW Megatron. (well, 2nd really!)
Check out fragraham's awesome Kitbash page by clicking the link!
Check out Kelly Hoffman alt page and what he did to make original Dinobot Swoop look more like he did in the shows.
"Tons of Alteration fun!" Ian Barfield has been busy! Check out his nice work by clicking the links: Arcee, SB Condor, SB Condor2, SB Condor3, Silverbolt, Silverbolt2, Silverbolt3, Bumblebee, Megatron, Otimus Primal, catbots, Cheetor, demon Prime, Diagnostic Drone, Dinobot, Frenzy, Hotrod, Ironhide, JetFire, Laserbeak tape, Laserbeak, Megatron, Noble, NightScream, Optimus Primal, Optimus Prime, Prowl, Scorponok, Shockwave, Silver Bolt, Sound Wave, Starscream, Tigertron, Rattrap, Ultra Starscream
Sa-weeeeet-ness! Check out Calilech's very impressive Unicron in planet mode picture1, picture2, picture3. and pictures of 'how he built it (from two Death Star snap together m,del kits) pic 1, pic2, pic3 Very impressive work!
RICHARD KING came up w/ a cool way to make Depth Charge's disk launcher to shoot further/faster/harder. Check it out!
Zobovor's Kitbashes and Custom's: is another OUTSTANDING Alterations page:
Zabgoth has his own kitbash page Check it out!
Yee, Robert had a very impressive display up of Blackarachina Pic1, Pic2
y2kaye sent pics of Ultra Optimus Prime he made, he also tried sellin' it on e-bay
WRECKERS DISPLAY! Straight from the Botcon Comic, someone (don't know who) had 'em on display! Ramulus1, Pic2, Cyclonus, Rotorbolt, Skywarp, mystery character 1, pic2, pic3, pic4
VxVLestatVxV@ added to his 'armada' of well done alts! His lastest TM Arcee here: Bot, beast, vehicle mode. Also BP Primal Pic1, Pic2, Pic3 and a fully tf'able BM Optimus Beast & Bot!
ultramagnuslrll sent us more great pics in addition to the ones listed below: Galvatron, Starscream Flying, Skylynx flying. ...they're of Transformers he designed and created from various gundam models. Awesome idea: Cyclonus, Cyclonus close, Megatron, Megatron close, Seekers, Seekers close, Skylynx, Skylynx close
UltimusPrime created his own character "Proteus" for a fanfiction he's writing & explanes: Proteus's beast mode is that of an Ultralisk using pieces from Torca, Scarem, Ramulas, TMII Spittor, TM Tarantulas, & from TM Scavenger. pic1, pic2, pic3, pic4
xanderalpha sent me 2 cool pics of a Unicron model made by Lance. It doesn't transform but but it does "eat tennis balls and stuff!" and it sure does look cool! PIC 1, PIC2
Voorhees, K created his own own character "Decepticon Prime" Check it out HERE and a figure stand for Deluxe Jetstorm he made out of plexy glass and glue!
Trout, Larry sent me a cool pic of an Optimus Prime & SD Musha(samuri style) Galvatron! He made it from an SD Musha Gundam Sandrock model kit.
Troop, Trent sent me a great explanation (no pics cuz pics don't really work well for this sort of alteration) of how to make your's an electronic Blastcharge.
Thostenson, Jeff (edgewise) has created his own Alts page. Check it OUT!
Streetwise made a Diagnostic Drone! & BMach Megatron PIC1, PIC2, PIC3, PIC4, PIC5. Man these are awesome!
Spencer's Model Page, has awesome authentic car replicas of original Autobots: Jazz, Sideswipe, Optimus and others...
Simpsnatic@aol.com sent me some awesome pics of the BW Season 3 Maximal Base he made. What a great idea!
Shum, Robert made a unique "Fuzor Gestault" (Combiner!)
|


